51Testing软件测试论坛
标题:
通过python生成不同的测试报告对比
[打印本页]
作者:
lsekfe
时间:
2021-6-10 09:46
标题:
通过python生成不同的测试报告对比
前言
无论做什么自动化,
测试
报告一定要有的,它可以清楚的展示出来我们执行用例的情况。便于查看
自动化测试
结果内容。安静这边了解目前通过
python
生成的测试报告分别有:HTMLTestRunner、BeautifulReport 、 pytest-html 和Allure,这几种报告内容都是属于不同的模板,本篇
文章
主要介绍下这如何生成以上四份报告的过程以及对比情况。
HTMLTestRunner
HTMLTestRunner是Python标准库的unittest模块的扩展。它生成易于使用的HTML测试报告。使用时需要下载,然后放到项目目录中
下载地址:
http://tungwaiyip.info/software/HTMLTestRunner.html
下载完成后,我们打开文件,其中有一段代码是告诉我们如何进行使用。
# output to a file
fp = file('my_report.html', 'wb')
runner = HTMLTestRunner.HTMLTestRunner(
stream=fp,
title='My unit test',
description='This demonstrates the report output by HTMLTestRunner.'
)
# Use an external stylesheet.
# See the Template_mixin class for more customizable options
runner.STYLESHEET_TMPL = '<link rel="stylesheet" href="my_stylesheet.css" type="text/css">'
# run the test
runner.run(my_test_suite)
复制代码
从上面代码中可以看出来,报告需要三个参数:
·stream:表示生成报告的路径
·title:表示报告的标题
·description:表示用例执行情况说明
安静来一段实例代码,来生成详细的测试报告:
import unittest
import HTMLTestRunner_cn
class Test(unittest.TestCase):
def test_01(self):
'''测试用例01'''
print('---用例01---')
def test_02(self):
print('---用例02---')
def test_03(self):
'''测试用例03'''
print('---用例03---')
if __name__ == '__main__':
# 测试报告地址
fp = open('result.html', "wb")
# 报告详情
runner = HTMLTestRunner_cn.HTMLTestRunner(stream=fp,
title=u'自动化测试报告,测试结果如下:',
description=u'用例执行情况:')
# 实例化
testunit = unittest.TestSuite()
# 加载用例
testunit.addTests(unittest.TestLoader().loadTestsFromTestCase(Test))
# 执行用例
runner.run(testunit)
# 关闭报告
fp.close()
复制代码
执行完脚本后,本地路径出现了一个测试报告,双击打开可以查看报告详情,其中用例中加入注释,可以方便配置用例详情显示。
BeautifulReport
BeautifulReport也是基于unittest中的一个报告框架,也是以HTML的报告形式进行展示出来的,可以通过pip直接进行安装下载。
安装:pip install BeautifulReport
验证安装:pip show BeautifulReport
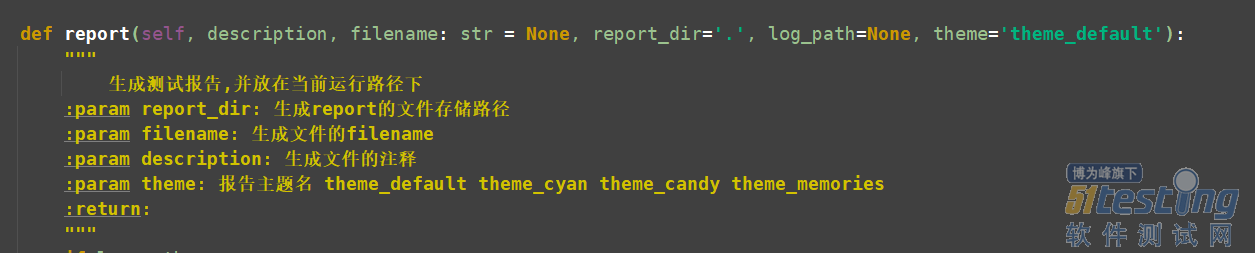
打开BeautifulReport的源码可以看到报告中已经将需要的参数列举下来了。
以上参数可以默认也可以进行自己手动修改。
import unittest
import BeautifulReport
class Test(unittest.TestCase):
def test_01(self):
'''测试用例01'''
print('---用例01---')
def test_02(self):
print('---用例02---')
def test_03(self):
'''测试用例03'''
print('---用例03---')
if __name__ == '__main__':
testunit = unittest.TestSuite()
# 加载用例
testunit.addTests(unittest.TestLoader().loadTestsFromTestCase(Test))
result = BeautifulReport.BeautifulReport(testunit)
result.report(filename='report', description='测试报告', log_path=None)
复制代码
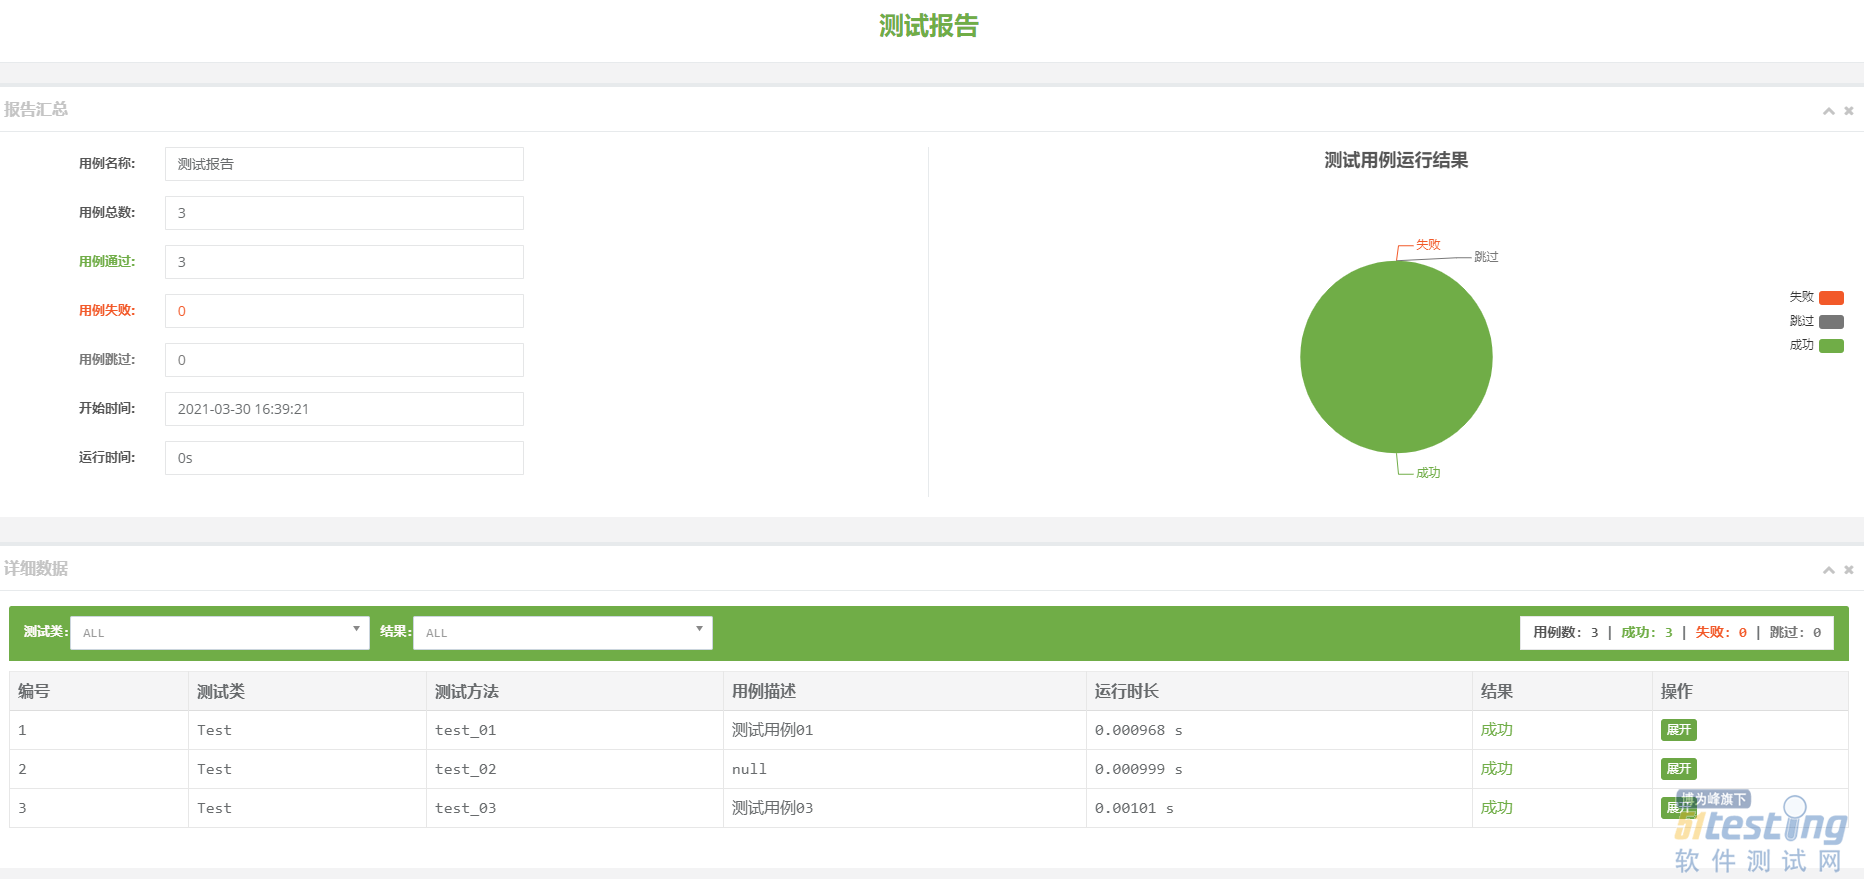
通过执行后可以看出生成了和HTMLTestRunner类似的测试报告。
pytest-html
pytest-html属于pytest第三方插件,使用时需要安装pytest和pytest-html。
安装pytest:pip install pytest-html
安装pytest-html:pip installpytest-html
pytest-html的源码地址:
https://github.com/pytest-dev/pytest-html
使用方法:
需要在执行的用例下通过终端形式输入命令 pytest --html=report.html (等号后面表示生成报告的路径和名称)。
class Test:
def test_01(self):
'''测试用例01'''
print('---用例01---')
def test_02(self):
print('---用例02---')
def test_03(self):
'''测试用例03'''
print('---用例03---')
复制代码
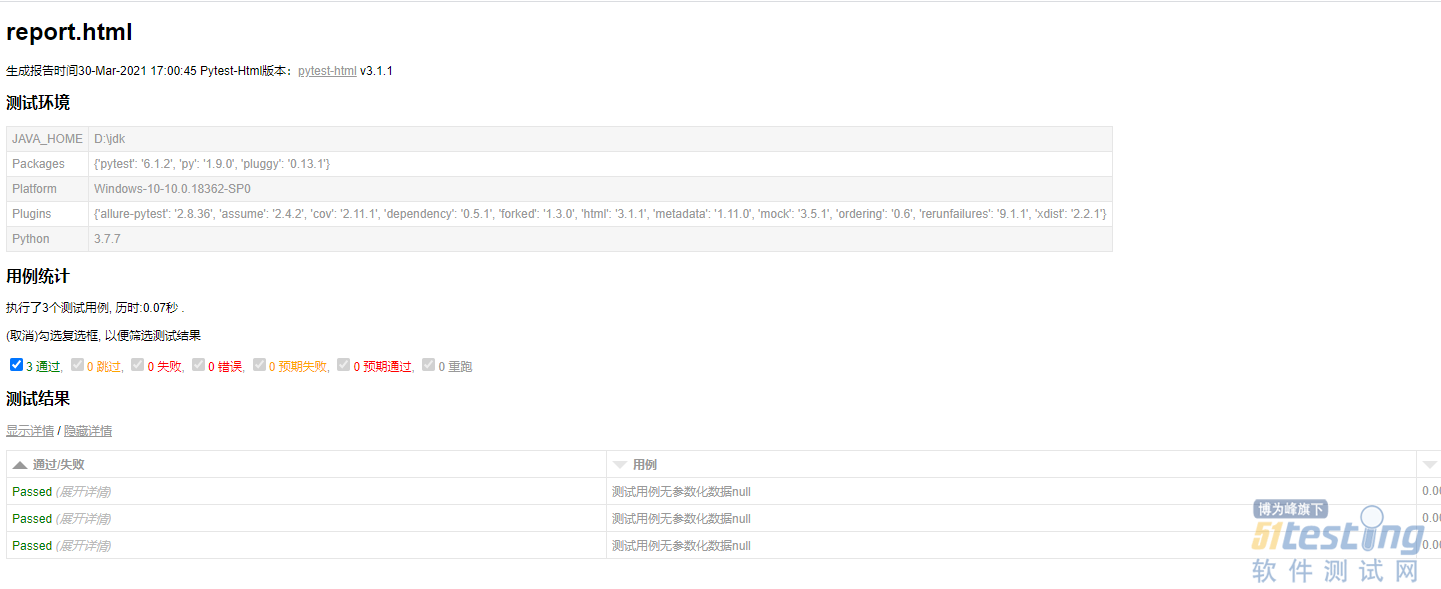
通过执行后,会在当前目录中生成一个report.html。
双击进行打开报告,可以看出详情的测试报告内容。可以看到和HTMLtestRunner的报告类似。
Allure
Allure也是属于一种开源的测试报告框架,基于多种语言,其中在python中是通过pytest单元测试框架进行生成的。也是目前测试行业中常用到的测试报告内容。其中allure是的环境是基于java的环境(下载JDK,配置环境变量)。
allure下载地址:
https://github.com/allure-framework/allure2
下载后通过解压,将allure中的bin文件放入到环境变量中即刻进行使用
我们是通过pytest单元测试框架进行生成allure报告的,需要安装第三方插件 allure-pytest,可以通过pip直接进行安装 pip install allure-pytest。
class Test_Allure:
def test_01(self):
'''测试用例01'''
print('---用例01---')
def test_02(self):
print('---用例02---')
def test_03(self):
'''测试用例03'''
print('---用例03---')
复制代码
想要生成测试报告需要先在执行
测试用例
时候,在命令行中加入生成报告的命令。
pytest --alluredir 报告目录
执行完后,会在当前目录中生成一个详细的report的报告目录,里面存放的就是执行用例的测试结果内容。
再次输入命令:
allure serve 测试结果目录
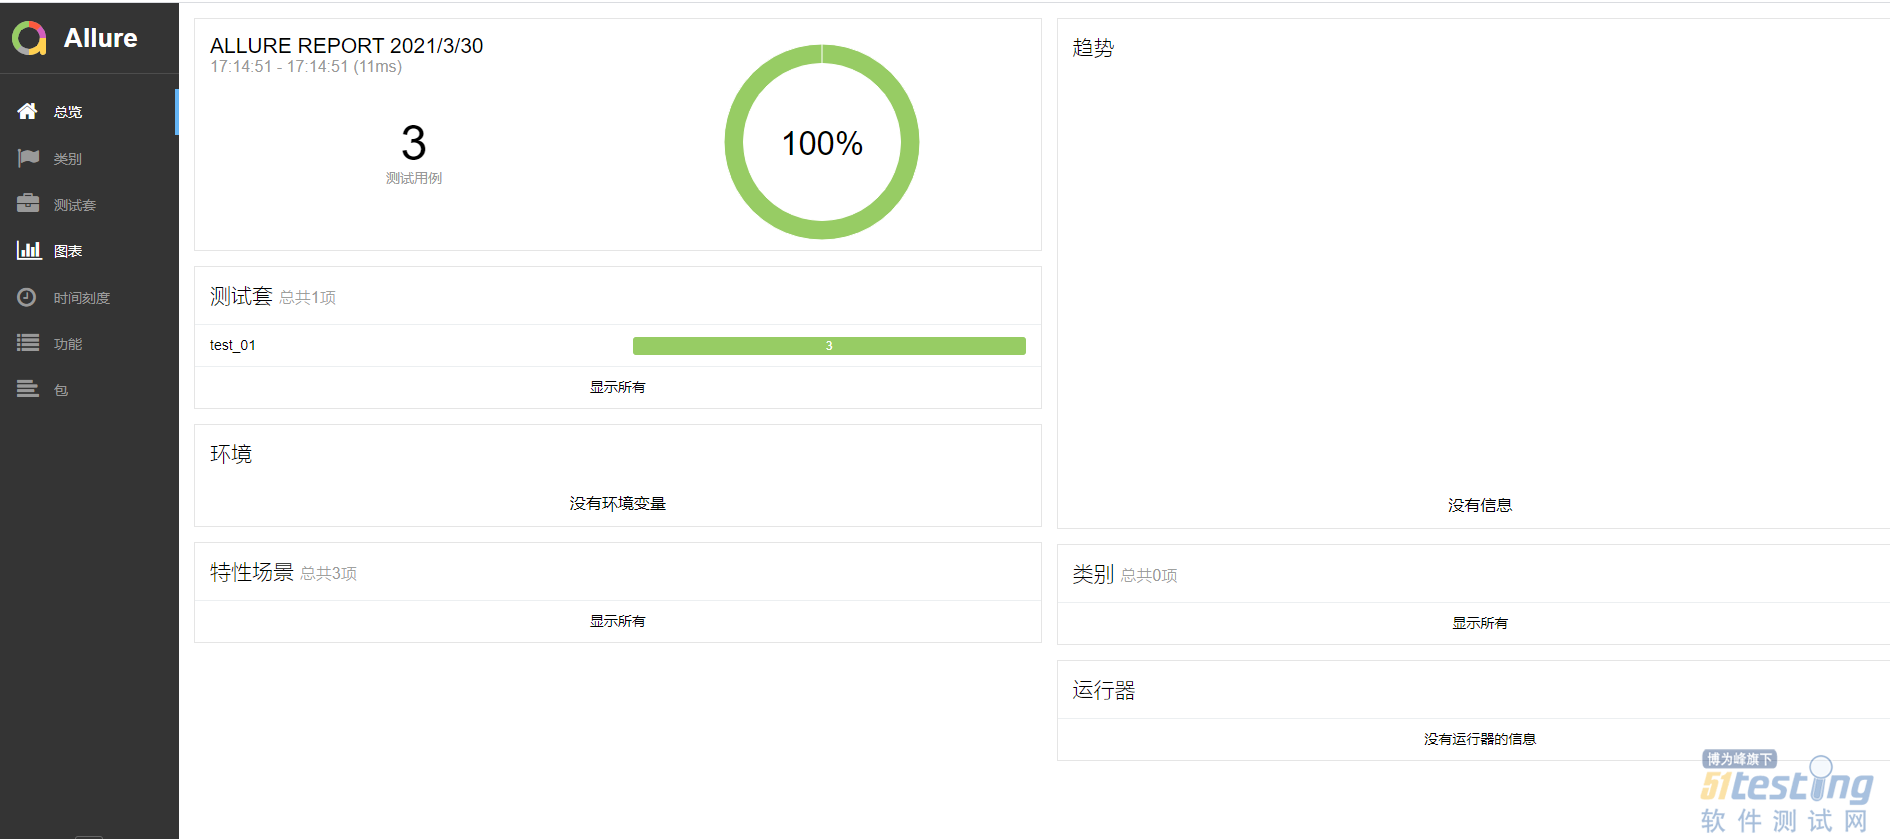
通过执行命令后,会在当前的
浏览器
中直接打开我们的测试报告内容。
总结
通过本篇文章,安静已经将目前市面上常用到的测试框架进行了总结,我想通过大家对图片中的报告认知,可能会感觉,HTMLtestRunner和BeautifulReport,pytest-html生成的报告内容基本差不多,将测试结果可以在一个页面中全部展示出来,但是我们的allure报告,存在多个页面内容,如果测试用例较多的话,可以进行查看更加方便快捷。好了,具体用到那个报告,就看个人爱好了~感谢大家阅读,希望本篇文章对您有所帮助!
欢迎光临 51Testing软件测试论坛 (http://bbs.51testing.com/)
Powered by Discuz! X3.2